


 Quick Start Tutorial
Sign up for the Fishbeam Cloud and upload your website to the cloud. With this tutorial you will learn step by step how to publish your website on the internet.
Your Personal Account for the Fishbeam Cloud
You need an account for the Fishbeam Cloud to load your website into the Fishbeam Cloud and publish it on the Internet. These account can be obtained from the website https://www.fishbeam.com/en/cloud/. Because of this, visit this page at first.
Choose between different packages for the Fishbeam Cloud. These differ essentially by the maximum number of websites that you can load into the cloud. You can test each package for 10 days free of charge and without obligation.
 You can also upgrade the package later if you want to load more websites in the Fishbeam Cloud and your booked package is not enough.

Click on the Register button below the desired process (you will have to scroll down the page). It will redirect you to Digistore24 to complete the registration.
With Digistore24 you can choose between different payment plans and payment methods for the desired package of the Fishbeam Cloud. Enter all required data there.
Even if Digistore24 asks for payment data, we do not process any payments. The payment will only processed after the free trial period. You can cancel your Fishbeam Cloud package at any time during the trial period and you will not be charged.
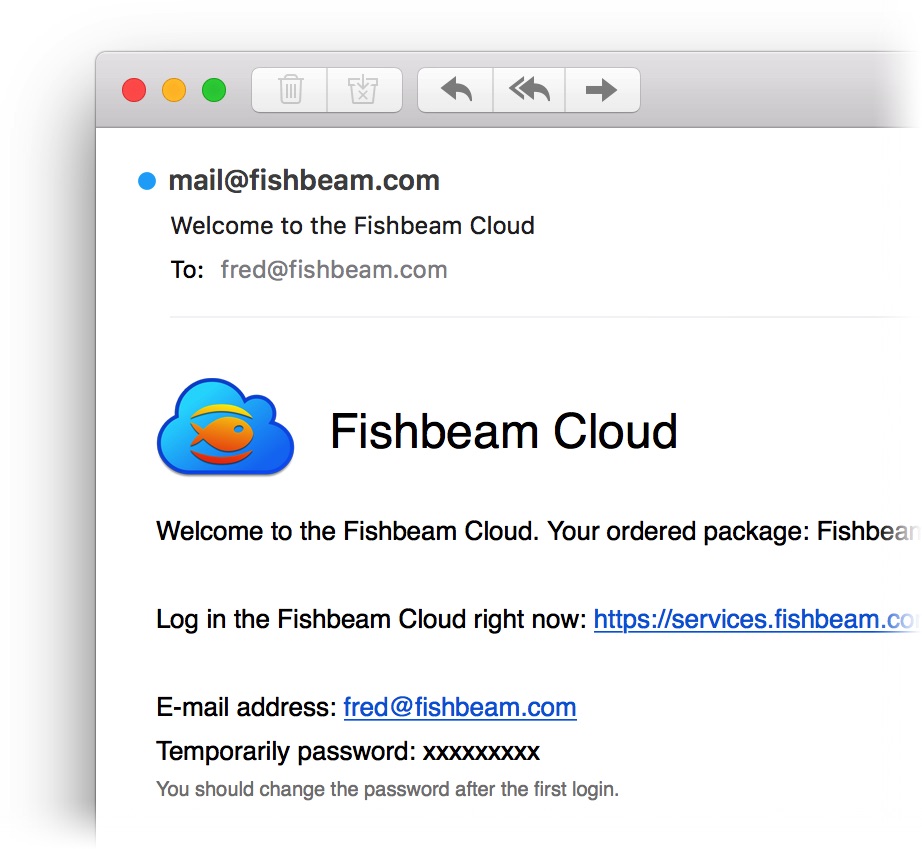
After successful registration you will immediately receive an e-mail with your account data for the Fishbeam Cloud. This allows you to publish your website in the Fishbeam Cloud and on the Internet.
Publish Your Goldfish Website in the Fishbeam Cloud
Start Goldfish and open your website. Then choose File> Publish Website As... from the menu. Your website will be generated and the Publish window will be opened.
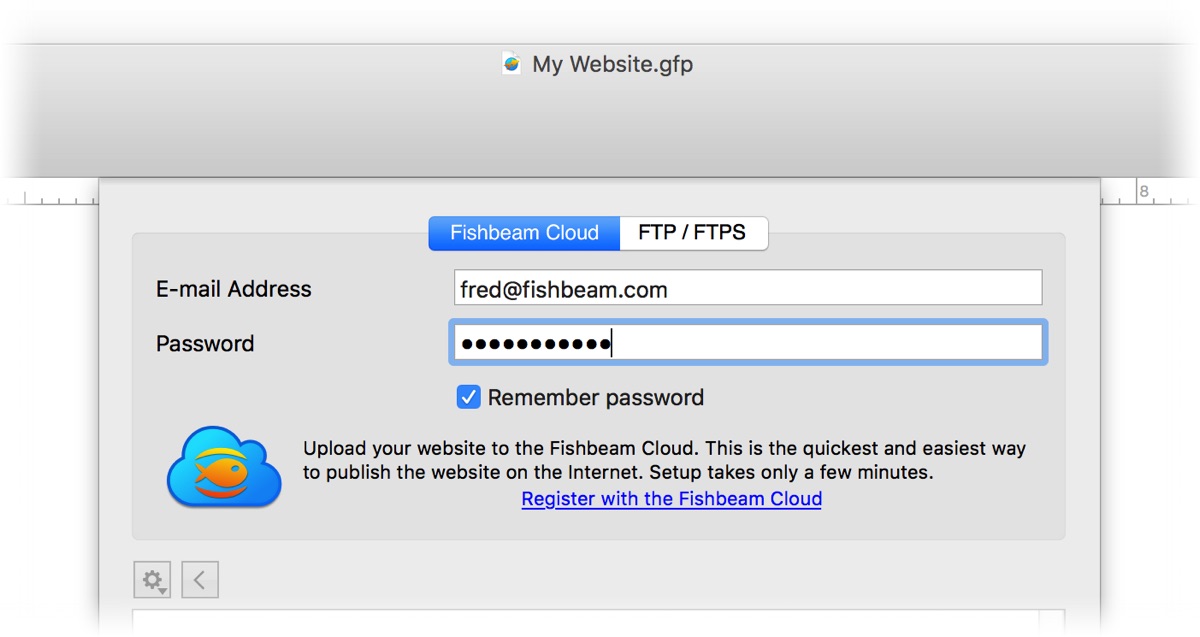
Enter your access data received via e-mail on the tab Fishbeam Cloud and click on Connect.
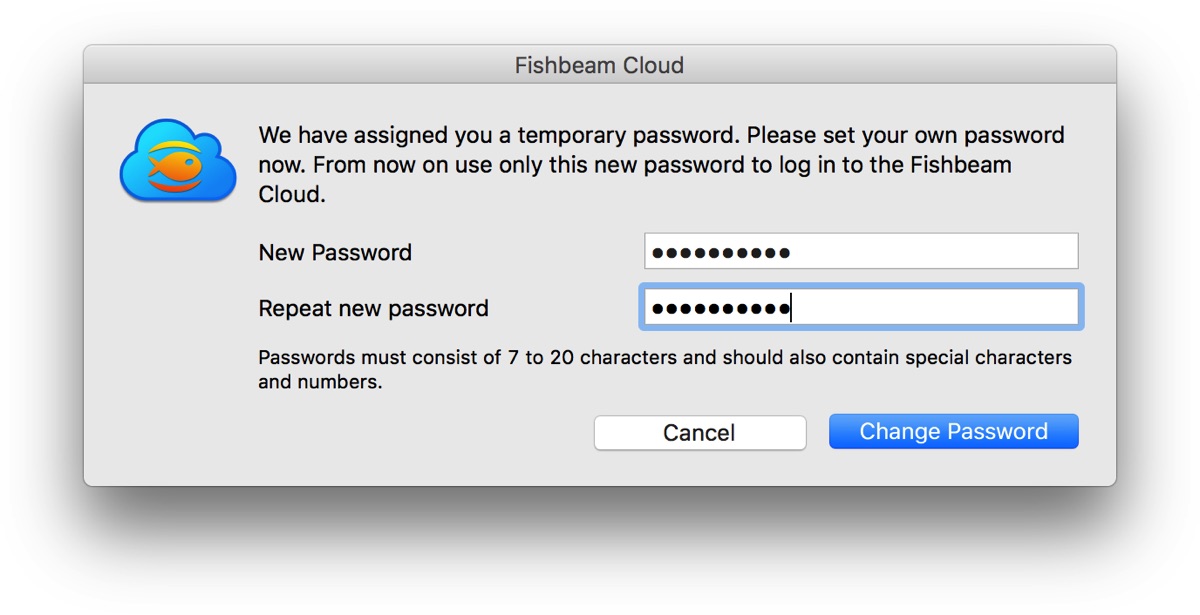
If you log in with the temporary password from the welcome e-mail, you will be asked to set a new password. Confirm this with Change password.
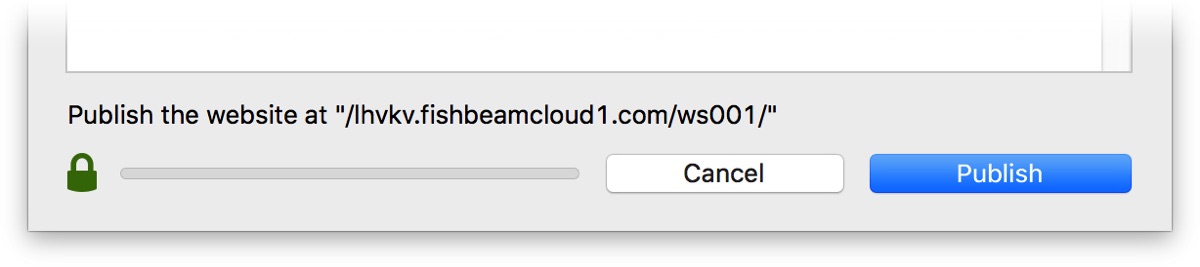
Click Publish and Goldfish will upload your website to the Fishbeam Cloud.
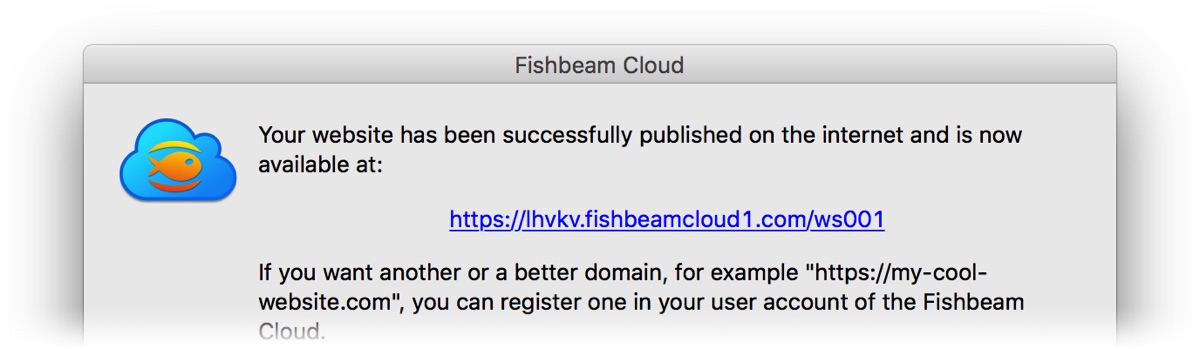
Your website will be online immediately after publishing and can be reached worldwide via the address shown. Try it out right now!
Order Your Own Domain
You should order your own domain for your website. Even if your website can be reached through the alternate address, a domain offers many advantages.
- Website visitors remember a concise domain better than the alternate address.
- If you choose the domain wisely and put keywords in it, search engines like Google place your website earlier the search results.
- Having your own domain makes your website look more professional.
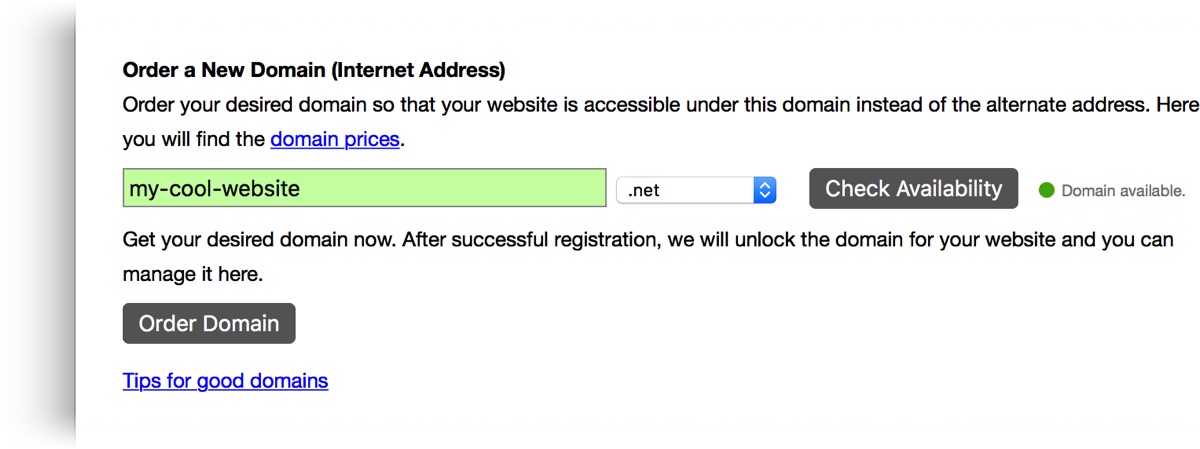
Log in to the Fishbeam Cloud user account to order your own domain. Click on Show websites & domains and scroll down to Order a New Domain (Internet Address).
Enter your desired domain in the field, select a domain extension and click Check Availability. This will tell you if your domain is already registered for another website.
Click on the button Order Domain, if you have found your desired domain. You will be redirected to Digistore24 to complete the order. Enter all required data there.
Please note: We can bill domains only once a year as we receive them from the respective domain registrar for an annual fee.
Tips for Good Domains
- A domain should be easy to remember and not too long.
- It should represent your website and reveal something about the content.
- Include search terms into the domain from that your website should be found on Google.
- Separate individual words with hyphens. For example, if you rent a holiday apartment in Paris, the domain "holiday-apartment-paris.fr" is a good choice.
Allocate the Domain to Your Website
After successful order, the domain appears at Websites & Domains > Not Allocated Domains (this may take a few minutes).
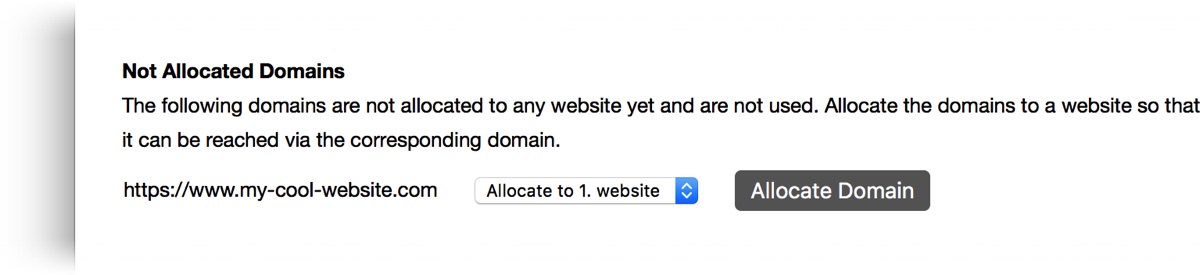
Select your desired website (only if you have already created several websites in the Fishbeam Cloud) and click on Allocate Domain.
Your domain will now be displayed on your website and marked with the note Order initiated. It takes a few working days for the domain to be successfully ordered, set up and your website accessible.
Good Luck With Your New Website
With this tutorial your Goldfish website is published on the internet and accessible under a custom domain. We wish you every success with your new website!