


 Tutorial: Your first Website
This is a tutorial for Goldfish beginners. Create your first Website right from the start without using a design.
There are some files required, to build a website with this tutorial. Please download our demo files. The zip archive contains demo images for this tutorial.
Let's start with your first Goldfish website. Start Goldfish with a double click on the application. Since you have Goldfish installed, it is located in Applications/Goldfish 2/Goldfish. If the design's windows appears, click on Cancel, because we don't want to build a website from a design now.
 If you want to build a website from a design, try out the tutorial: Build Your Website From a Design.
A new, blank project appears. On the left, there is the project list, which contains pages and templates. On the right there is the property palette where you can change the properies of all elements of your website. The editor itself is in the middle and on the top the tools. At the moment there is only one tool available: Page Area.
Creating The Layout
Before we add content to the website, we need a layout, which is on all pages the same. It contains a header, a navigation, a footer and of course the main area where all the content of your website, like pictures and text is displayed.

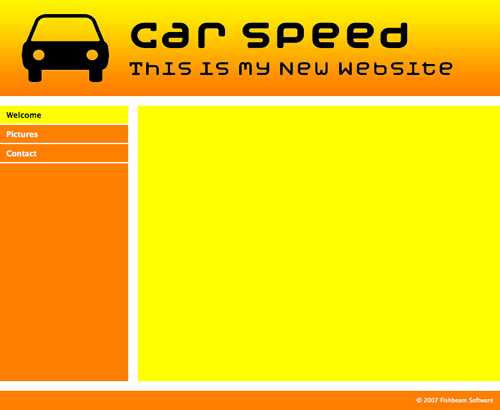
You are very flexible with Goldfish and can build nearly every possible layout, but for the tutorial we will use a simple layout. The yellow space is the main area with the content of your website. On the left (blue) is the navigation where you can browse through the pages of your website. We will also create a header (red) with logo and title and a footer with copyright information (green).
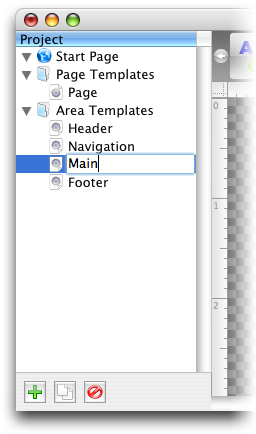
To start with the layout, take a look on the project list on the left. There are three categories: Start Page for all pages of your website. Start page is the front page of your website.
A page consists of the page itself and page areas where you can define areas of your page (header, navigation, main etc. like in the colored image above). Inside of a page area are page items with text, images, galleries, movies etc. (the content of your website).
The category Page Templates contains layout templates for pages. This is useful, because websites have usually a consistent layout on every single page. We will store a page template there and use it for all pages of your website. Click on Page Templates, it will be selected. Then on the + button on the left bottom side of the window. A new page template will be created. Just rename it to Page, because it is the only page template that we will use for this project. Double click on the page template and you can rename it.
Now click on Area Templates. Here you can store templates for page areas, which are for all pages the same. Remember the areas for your website? We have four areas: Header, navigation, main and footer. So click four times on the + button and rename the area templates with their correct labels.
We have created all neccessary templates for the layout, but we have not yet set the style. The style will be set in the properties on the right side of the window. The shown properties change depending on the item which you have selected. If you have selected nothing (the editor shows the Goldfish logo) all project properties are shown. If you select a page, the page's properties are shown.
Now select in the section Page Templates the template Page. The properties of the template Page are visible.

We want a larger website: Change the value of Page Width (min) to 780. The page with sets the total width of the space for page areas and page items. We want a website with a white background color. So click on the color picker behind "Background Color" and change it to white.
Now we change the style of the area templates. Select the template area Main. The properties change to Page Area. Change Margin Top and Margin Bottom to 15. This defines 15 px space to the next top and bottom page area. Then Width to 565 and Height (min) to 430. the width is a fix value, but the height depends on the content of the area (long texts make it larger). The minimum height is 430 px. Change the Background Color to yellow. Instead of using the color picker, you can enter a html color value in the field. Enter #ffff00 for yellow.
Let's go to the Footer template. Set Width to 780, Height (min) to 30 and Background Color to orange (#ff8000). Here we need some copyright information. Go to the tools on the top of the window and drag from the first tool Text a text item to the editor. The text item shows the text Lorem ipsum dolor..., but not the text that we want. So double click on the text and you can edit it. Write something like © 2007 Fishbeam Software.
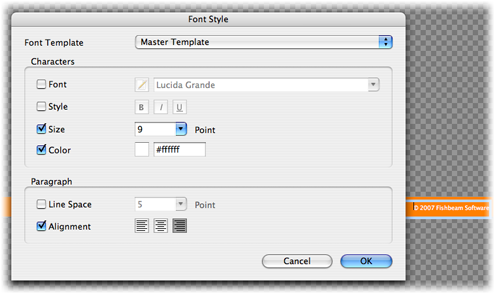
Change the font style of the text field. Select the text and click on Edit Text > Font Style > Choose... in the properties.
You will see all avialable font style properties with a checkbox in front of every property. The font system in Goldfish is very flexible. Goldfish uses always the style of a font template (here Master Template). But you can overwrite every single style property of the template. Set the style like in the screenshot above. Learn more about fonts and font template in the font templates help.
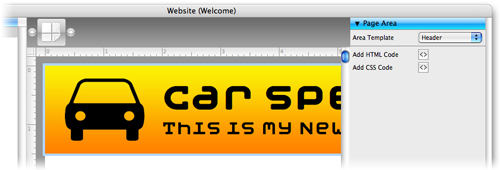
Let's go to the next area template Header. Here should be a logo and the title of the website. But at first change the properties: Set Width to 780 and Height (min) to 150. Enable Background Picture and click on the question mark behind. Choose background.png from the downloaded tutorial files. Now the media importer window opens. Deactivate Reduce image size to max. and click OK.
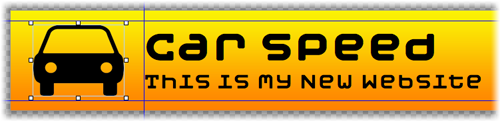
Notice the blue lines in the screenshot: This are alignment guides. You can drag alignment guides from the rulers to create your layout. To delete an alignment guide, drag it back into the ruler. Now we want to add a logo: Drag a picture item from the tools to the editor. Go to "Picture > Picture" and choose "car.png" from the tutorial files.
For the title, drag a text item to the editor and write Car Speed and in the next line This is my new website.. Go to Edit Text > Font Style and set Font to Moby Bold and Line Space to 12. Click OK. Now we want to make the first line bigger. Select only the first line, choose Edit Text > Font Style and set Size to 60. Repeat this for the second line and set Size to 30.
Important: After you have edited the text, click outside of the text field, to stop the text edit mode. Enable Text > Render as Picture in the properties. This is because Moby Bold is a special font which is not installed on the computers from most of your website visitors. Goldfish will then generate an image from the text so that all visitors can see the correct font. Please use this option always if you have headlines and titles with special fonts.
Now go to the last template area: Naviagtion. Here should be a navigation menu. At first change the properties of the area: Change Margin Right, Margin Top and Margin Bottom to 15, Width to 215, Height (min) to 430 and Background Color to #ff8000 (orange). Drag a navigation menu from the tools to the editor.
A navigation menu shows one entry for every page of your website. At the moment only Untitled for the start page, because there are not more pages at the moment. Let's change the style of the menu. Deactivate Menu > Highlight Parent Entry. Then open the Mainmenu Entry section. This sets the style for a menu entry of the main menu. Set Alignment to Left, Font Style > Style to Bold and font Style > Color to #ffffff (white), Padding Left to 10, deactivate Background Color, Set Border Bottom Width to 2 and Boder Bottom Color to #ffffff (white).
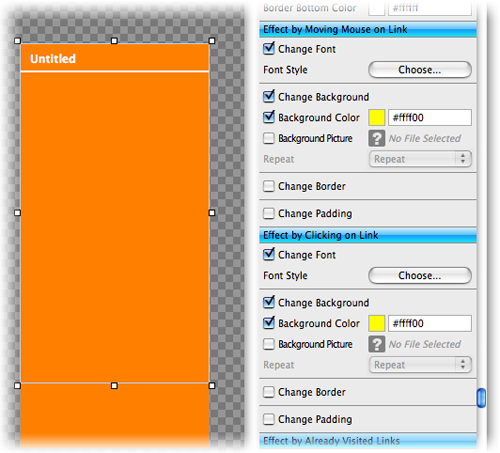
Now take a look at the effects section. Effects are used to change the appearance if the user reacts. (eg. if the user moves the mouse over a link or menu item). This link, for example, changes the color, if you move your mouse on it. Let's set the effects for menu items: Go to Mainmenu Entry > Effect by Moving Mouse on Link in the properties. Enable Change Font and choose #000000 (black) as font color. Set Background Color to #ffff00 (yellow). Repeat this for Effect by Clicking on Link.
Now go to Submenu Entry. Sub menu entries show sub pages of a page. Set the style of Submenu Entry exactly to the style of the Mainmenu Entry (repeat the steps above). But there is one exception: Set Padding Left to 20 and not to 10 like in the main menu. This is because the user should see a difference between the main and submenu.Creating Pages
The layout is complete now. In the next step we will build the start page: Select Start Page in the page list. At the moment the page is empty. Drag 4 page areas from the tools to the editor. Of course they are for our four templates. Select the first page area.
Go To Page Area > Area Template in the properties and select Header. The header template appears in the new page area. Set Area Template for the second page area to Navigation, Main for the third and Footer for the last. We have an empty page with our own layout, now. For the tutorial we want three page. So go to the bottom of the page list an click Duplicate Item two times.
Our navigation menu shows for every entry Untitled. Select Start Page in the page list, click on the gray border so that the properties for Page are shown and change Page > Title and Page > Menu Title" to "Welcome. And for the other two pages: Pictures for the second page and Contact for the third.
The second page has the name page.htm in the page list. That is not very specific. Change it to pictures.htm and the name for the third page to contact.htm (remember, rename it with a double click on the page name).
You have many pictures? No problem: Let's create subpages. Select the page pictures.htm and enable Page > Page Has Subpages in the properties. Now, the page has a triangle in front of the page name (.htm disappears). Duplicate the page contact.htm two times and move it into pictures.
It's time to check the layout. Choose Format > Preview in Browser in the menu. Your webbrowser opens your new website.
Fill The Website With Content
The page structure is complete now. Let's fill the pages. On the start page we want two text items and a visitor counter. Add two text items. You can enter text, but here in the tutorial I will use the default fill text.
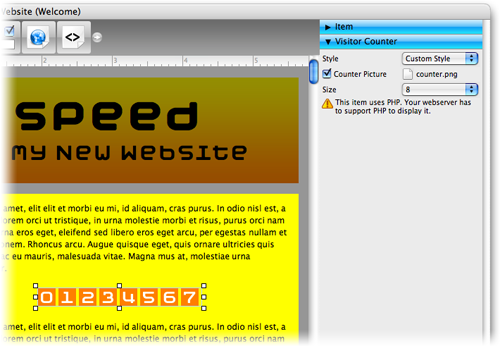
Now drag a visitor counter from the tools to the editor. The visitor counter counts the total number of visitors from your website. We don't want to use the default style of the counter. Go to Visitor Counter > Style in the properties and select Custom Style. Enable Counter Picture and choose the image counter.png from the tutorial files. Change Size to 8.
Next Page: Select pictures.htm. Here should be a gallery with our favourite pictures. Drag a gallery item from the tools to the editor. Then go to the properties and click on Gallery > Read From Folder > Choose.... Here you can choose a folder with images for your gallery. Choose Gallery Pictures from the tutorial files. Activate For All in the bottom left corner of the media import window, so that the window will not pop up for every file. Then click OK.

Set a title for your gallery. Go to Gallery > Title in the properties and change it. The last thing we need to to is to change the size of the thumbnails so that the gallery fits exactly into the page. Go to Preview Icon in the properties and change the values Icon Width (Max), Icon Height (Max) (the width and height of the thumbnail), Margin Horizontal and Margin Vertical (the space between the thumbnails).
There should be a contact form on the contact page. Drag a form item from the tools to your page. By default there are form elements, which you need for a contact form. Go to Send Page > E-Mail Address in the properties and enter your e-mail address. To this addess the form will be sent.
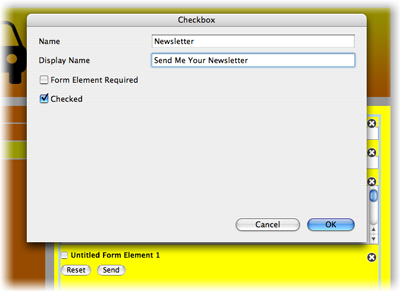
Let's add a form element: Say you have a newsletter. Double click on the form item. The toolbar changes and shows more form elements. Drag a checkbox to the form. You can change the postion of the elements with drag and drop and delete an element by clicking on the x-button. Double click on the checkbox to edit the element. Change Name and Display Name (the name of the checkbox and the caption which is shown on the website). Enable Checked so that the checkbox is checked by default. Click OK
Now your website is complete (we haven't filled the subpages of Pictures, because they also should contain galleries only). Choose Format > Preview in Browser in the menu to check it.
Publish Your Website
It's time to publish your website on the internet. Therefore we will use the build in ftp publisher. For this chapter you will need the ftp login for a website hosting service. Your ftp login data should be something in this form:
- Server: ftp://myftpaccount.hostingservice.com
- Username: myloginname
- Password: mypassword
If you don't have webspace at a website hosting service, just Choose "File > Build Website..." in the menu and publish your website on the desktop.
Choose File > Publish Website... and the publish window will pop up. Enter Server (without ftp:// prefix if it is part of the server address), Username, and Password. Click OK.
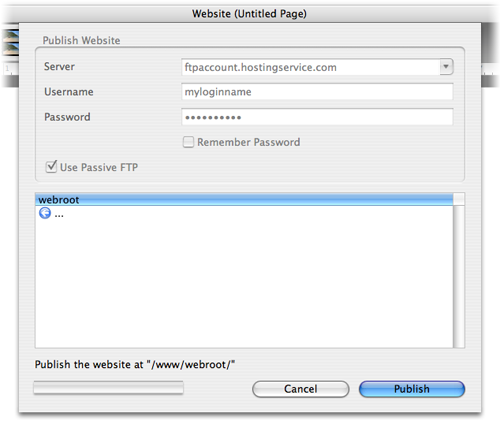
Now you can see a list of the folders from your ftp server. browse through the folders (doublecklick) and select the destination for your website. In my case I have to publish it in /www/webroot/. If you have selected the destinantion, click on Publish. Goldfish publishes now your website.
That's it. Your website is online on the internet now. Try out your internet domain, the website should be there.