


 Online Shop (Product & Shopping Cart)
Set up an online shop on your website. This works with a shopping cart item and some product items, which you can drag from the items to the website.
The product and the shopping cart item is only available in Goldfish Professional. 
Goldfish allows you to set up an online shop in only minutes. The shop is based on a shopping cart item and one or more product items. You can add an online shop to each area, slider area and area template. To add an online shop, edit the content of an area, slider or page template and drag one or more product items as well as a shopping cart item from the items in the editor.
Make sure that you only use one single shopping cart in your online shop. Therefore, place the cart item on an area template that you can use on all shopping pages. Use a product item for each different product that you want to sell.
E-Commerce Regulations in the European Union
If you operate the Online Store from within the EU, you need to operate your online store according to the e-commerce regulations of the EU. This guide can help you with that. If you operate your online shop from outside the EU, other rules may apply.
 Please note that we can not assume any liability for completeness and accuracy of this manual and our shop software. Ask a lawyer to check your online shop if you want to make sure that all regulations are respected correctly.
Preparations for the Online Shop on your Website
- Create a new sub page with shipping costs. List your shipping costs there. Additional costs for payment methods (cash on delivery) must also be listed. You have to offer at least one widely-used payment method at no additional cost. Look for assistance on the Internet or ask a lawyer to specify the shipping costs correctly.
- Create a new sub page for the terms and conditions. Place your terms and conditions there. Look for assistance on the Internet or ask a lawyer to specify the terms and conditions correctly.
- Consumers have the right to cancel orders. Create a new sub page for the cancellation policy. Place your cancellation policy there. Look for assistance on the Internet or ask a lawyer to specify the cancellation policy correctly.
Placing the Shopping Cart
Place a shopping cart on the page. Use exactly one cart for your online shop and not more. You can put the cart on an area template if you are using multiple sub pages with products. Then use the area template with the shopping cart on each sub page.

The next step is to set the correct properties of the shopping cart.
- Enter your e-mail address at Shopping Cart > E-Mail Address. Then you will receive an e-mail when a customer has ordered something.
- Click on Choose... behind Cart > Payment Options and delete all the payment methods that you do not want to offer. You can write other payment methods, that you want to offer in a new line on the list. All payment methods except PayPal can only be selected by the customer, but there is no automatic payment processing. In the second column, you can specify additional payment costs that are charged to the customer when the payment method is selected. Enter the payment costs according to your specifications on the sub page, that you have created previously.
- Click on Choose behind Shopping Cart > Countries and delete all the countries to which you don't want to deliver. You can add other countries at the end of the list. There you can also enter the the shipping costs per country and set an order value, from that the shipping is free. Enter the shipping costs according to your specifications on the sub page, that you have created previously.
- Disable Shopping Cart > State, if you do not sell to countries that need the state in the address (eg. the USA).
- Activate Shopping Cart > Link to Terms and Conditions, and select the earlier created sub page with the terms and conditions as the link target.
- Activate Shopping Cart > Link to Cancellation Policy, and select the earlier created sub page with the cancellation policy as the link target.
- Click on Choose... behind Shopping Cart > Text in Cart and enter the complete shipping and payment costs for your online shop there too.
- Click on Choose... behind Shopping Cart > Text in Order Confirmation and paste your cancellation policy at the marked point. The full text of the cancellation policy must be pasted.
Setting up PayPal
Enable Shopping Cart > Use PayPal in the properties if you want to use PayPal as a payment method. Then login on the PayPal website and look for the API keys of your PayPal account.
- Click after the login to Selling with PayPal > Seller preferences.
- Click on the next page at API Access on Request or Update.
- Select Option 2 - Request API credentials to create your own API username and password.
- Click on View API Signature.

Paste the stored data in the corresponding fields from the properties at Shopping Cart > Use PayPal.
Make sure that you have stored the payment method PayPal in the properties at Shopping Cart > Payment Options. Otherwise, PayPal will not appear in your online store.
Adding Products
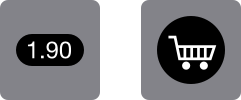
Place a Product item on the page for every product that you want to sell.
- Enter a unique item number for the product in the properties at Product> Product ID . This can not contain any spaces or special characters.
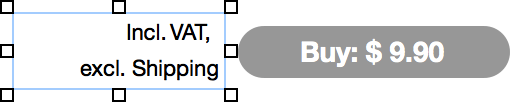
- Enter the name of your product and a very brief description of the essential features of your product at Product > Product Name. This description must be displayed in the cart if you operate your online shop from the EU.
- Enter the price of your product at Product > Price. The currency is already set in the shopping cart.
- Change the price of the product to the price of your choice at Product > Label.
- Place a text item next to each product item with the text Incl. VAT. excl. shipping costs. Be sure to use the words shipping costs as a link to the page with the shipping shipping costs. We suggest to activate Open link in a new window in the link window.
This item uses PHP. Your webserver must support PHP to use it.
Properties for the Shopping Cart Item
These properties can be set for the shopping cart item. Select the shopping cart item to see its properties.
| Item > Identifier (Id) | Specifies the name of the item in order to address it in animations or as a link target. Use only letters and numbers for the name, no spaces or special characters. |
|---|---|
| Item > Left | Sets the distance in pixels from the left side of the item to the area where the item is located. |
| Item > Top | Sets the distance in pixels from the top side of the item to the area where the item is located. |
| Item > Width | Sets the width of the item in pixels. |
| Item > Height | Sets the height of the item in pixels. |
| Item > Padding Left | Sets the distance from the left side of the item to the content in pixels. |
| Item > Padding Right | Sets the distance from the right side of the item to the content in pixels. |
| Item > Padding Top | Sets the distance from the top side of the item to the content in pixels. |
| Item > Padding Bottom | Sets the distance from the bottom side of the item to the content in pixels. |
| Item > Background Color | Select a background color for the item. |
| Item > Background Picture Clip | Select a background picture from the Fishbeam Clips library. This option is only available if you have the Fishbeam Clips library installed. |
| Item > Background Picture | Select a background picture for the item. With Repeat, you can choose how the picture will be displayed. On Retina websites the background picture will be displayed with double resolution, but half the size (except SVG images). |
| Item > Repeat | Repeats the background picture.
|
| Item > Position Horizontal | Sets the horizontal position of the background picture. If the picture will be repeated, it will be placed once on the specified position and the remaining space on the left, on the right, above and below will be filled. |
| Item > Position Vertical | Sets the vertical position of the background picture. If the picture will be repeated, it will be placed once on the specified position and the remaining space on the left, on the right, above and below will be filled. |
| Item > Fix relative to Browser window | The position of the background picture is calculated on the basis of the browser window. The picture is pined to the window and will not move when scrolling. The picture can be hidden or only parts are visible if it is outside of the visible space. |
| Item > Border Left Width | Displays a border on the left side of the item in the choosen width (pixels). |
| Item > Border Left Color | Select a color for the left border. |
| Item > Border Right Width | Displays a border on the right side of the item in the choosen width (pixels). |
| Item > Border Right Color | Select a color for the right border. |
| Item > Border Top Width | Displays a border on the top side of the item in the choosen width (pixels). |
| Item > Border Top Color | Select a color for the top border. |
| Item > Border Bottom Width | Displays a border on the bottom side of the item in the choosen width (pixels). |
| Item > Border Bottom Color | Select a color for the bottom border. |
| Item > Opacity (%) | Makes the item transparent. From 0% (fully transparent) to 100% (completely visible). |
| Item > Rotation | Rotation of the object in a clockwise direction from 0° to 360°. |
| Item > Moving Mouse Over Animation | Select an animation that you have previously created with an Animation item. The animation will be started as soon as the website visitor moves the mouse over the item. |
| Item > Moving Mouse Out Animation | Select an animation that you have previously created with an Animation item. The animation will be started as soon as the website visitor moves the mouse from the item. |
| Shopping Cart > E-Mail Address | Enter the e-mail address to which the orders will be sent. |
| Shopping Cart > Use external SMTP server | Allows you to send emails through an SMTP server. Enable this option if you encounter problems when sending emails. |
| Shopping Cart > SMTP Server | Enter your SMTP server. You can get this information from your e-mail provider or your email client. |
| Shopping Cart > SMTP User | Enter your SMTP user. You can get this information from your e-mail provider or your email client. |
| Shopping Cart > SMTP Password | Enter your SMTP password. You can get this information from your e-mail provider or your email client. |
| Shopping Cart > Show message with contact e-mail address if a mail error occures | If an error occurs while sending the order, the e-mail address for order will be shown. Then the page visitor can order directly via e-mail. |
| Shopping Cart > Message | The message that appears to order by e-mail. Write % s as a placeholder for the email address. |
| Shopping Cart > E-Mail Subject | Subject in order notification e-mails. |
| Shopping Cart > Currency | Currency for orders. |
| Shopping Cart > Decimal Point | Decimal point for currency formatted numbers. |
| Shopping Cart > Tax (%) | Tax ammount for all orders. |
| Shopping Cart > Tax Included | Enable this if the tax is included in the prices of the products. Otherwise the tax will be added to Estimated Total. |
| Shopping Cart > Calculate Shipping Fee | Enable this option to calculate shipping fees. The amount of shipping fees is set in Shopping Cart > Countries. |
| Shopping Cart > Use PayPal | Enable this option if you want to allow payments via PayPal. In addition, PayPal has to be stored in Shopping Cart > Payment Options. |
| Shopping Cart > API User | Enter the API username, that you have received from PayPal. |
| Shopping Cart > API Password | Enter the API password, that you have received from PayPal. |
| Shopping Cart > API Signature | Enter the API signature, that you have received from PayPal. |
| Shopping Cart > PayPal Checkout Text | Text that appears in PayPal durinmg the payment. |
| Shopping Cart > Payment Options | List of payment options, that are supported in the store. |
| Shopping Cart > Countries | A list of countries to that you want to deliver. |
| Shopping Cart > State | Adds a field for the state to the order process (needed for US and Canadian addresses). |
| property]Shopping Cart > Comment | Adds a field for comments to the order process. |
| Shopping Cart > Generate order number | Generates a unique order number for every order and displays it in all order e-mails. |
| Shopping Cart > Terms and Conditions Link | Displays a link to the Terms and Conditions during the order process. In the link window, you can determine where the link should lead to.
|
| Shopping Cart > Cancellation Policy Link | Displays a link to the Cancellation Policy during the order process. In the link window, you can determine where the link should lead to.
|
| Shopping Cart > Text in cart | Text that appears in the shopping cart. |
| Shopping Cart > Text in Order Summary | Text that appears on the order summary page. |
| Shopping Cart > Text in Order confirmation | Text that is displayed in the order confirmation e-mail. |
| Button > Button Type | Specifies the appearance of the shopping cart.
|
| Button > Font Style | Specifies the font style for the shopping cart. Activate a checkbox to set a style attribute and override the global Font Template of the project.
|
| Button > ... Items | Text in the shopping cart for ... Items |
| Button > 1 Item | Text in the shopping cart for 1 Item |
| Button > Checkout | Text in the shopping cart for Checkout |
| Button > Use cart animation | Displays a star, flying from the product to your cart, when buying. |
| Button > Color of Count Badge | Color for the counter display in the shopping cart. |
| Button > Font Color of Count Badge | Font color for the counter display in the cart. |
| Button > Custom Button Picture | Select a picture as an icon for the button, if you don't like the default shopping cart. |
Visual Effects
You can specify a visual effect, if a website visitor interacts with the shopping cart (e.g. change the picture if the visitor moves the mouse over the button). The following properties are the same for Moving Mouse Over Link Effect and Clicking on Link Effect.
| Effect > Change Picture | Changes the picture. Select an picture to which you want to change. |
|---|
Properties for the Shopping Cart Item
| Page Background > Background Color | Select a background color for the shopping cart page. |
|---|---|
| Page Background > Background Picture Clip | Select a background picture from the Fishbeam Clips library. This option is only available if you have the Fishbeam Clips library installed. |
| Page Background > Background Picture | Select a background picture for the shopping cart page. With Repeat, you can choose how the picture will be displayed. On Retina websites the background picture will be displayed with double resolution, but half the size (except SVG images). |
| Page Background > Repeat | Repeats the background picture.
|
| Page Background > Position Horizontal | Sets the horizontal position of the background picture. If the picture will be repeated, it will be placed once on the specified position and the remaining space on the left, on the right, above and below will be filled. |
| Page Background > Position Vertical | Sets the vertical position of the background picture. If the picture will be repeated, it will be placed once on the specified position and the remaining space on the left, on the right, above and below will be filled. |
| Page Background > Fix relative to Browser window | The position of the background picture is calculated on the basis of the browser window. The picture is pined to the window and will not move when scrolling. The picture can be hidden or only parts are visible if it is outside of the visible space. |
| Page Background > Opacity (%) | Sets the opacity for the background. |
| User Interface > Background Color | Select a background color for the shopping cart. |
| User Interface > Background Picture Clip | Select a background picture from the Fishbeam Clips library. This option is only available if you have the Fishbeam Clips library installed. |
| User Interface > Background Picture | Select a background picture for the shopping cart. With Repeat, you can choose how the picture will be displayed. On Retina websites the background picture will be displayed with double resolution, but half the size (except SVG images). |
| User Interface > Repeat | Repeats the background picture.
|
| User Interface > Position Horizontal | Sets the horizontal position of the background picture. If the picture will be repeated, it will be placed once on the specified position and the remaining space on the left, on the right, above and below will be filled. |
| User Interface > Position Vertical | Sets the vertical position of the background picture. If the picture will be repeated, it will be placed once on the specified position and the remaining space on the left, on the right, above and below will be filled. |
| User Interface > Fix relative to Browser window | The position of the background picture is calculated on the basis of the browser window. The picture is pined to the window and will not move when scrolling. The picture can be hidden or only parts are visible if it is outside of the visible space. |
| User Interface > Padding Left | Sets the distance from the left side of the shopping cart to the content in pixels. |
| User Interface > Padding Right | Sets the distance from the right side of the shopping cart to the content in pixels. |
| User Interface > Padding Top | Sets the distance from the top side of the shopping cart to the content in pixels. |
| User Interface > Padding Bottom | Sets the distance from the bottom side of the shopping cart to the content in pixels. |
| User Interface > Border Left Width | Displays a border on the left side of the shopping cart in the choosen width (pixels). |
| User Interface > Border Left Color | Select a color for the left border. |
| User Interface > Border Right Width | Displays a border on the right side of the shopping cart in the choosen width (pixels). |
| User Interface > Border Right Color | Select a color for the right border. |
| User Interface > Border Top Width | Displays a border on the top side of the shopping cart in the choosen width (pixels). |
| User Interface > Border Top Color | Select a color for the top border. |
| User Interface > Border Bottom Width | Displays a border on the bottom side of the shopping cart in the choosen width (pixels). |
| User Interface > Border Bottom Color | Select a color for the bottom border. |
| User Interface > Font Style | Specifies the font style for the shopping cart. Activate a checkbox to set a style attribute and override the global Font Template of the project.
|
| User Interface > Items | Text in the user interface for Items. |
| User Interface > Item Price | Text in the user interface for Item Price. |
| User Interface > Quantity | Text in the user interface for Quantity. |
| User Interface > Item Total | Text in the user interface for Item Total. |
| User Interface > Shipping Fee | Text in the user interface for Shipping Fee. |
| User Interface > From ... | Text in the user interface for From .... |
| User Interface > Estimated Total | Text in the user interface for Estimated Total. |
| User Interface > Close | Text in the user interface for Close. |
| User Interface > Checkout | Text in the user interface for Checkout. |
| User Interface > Back | Text in the user interface for Back. |
| User Interface > Next | Text in the user interface for Next. |
| User Interface > Submit Order | Text in the user interface for Submit Order. |
| User Interface > First Name | Text in the user interface for First Name. |
| User Interface > Last Name | Text in the user interface for Last Name. |
| User Interface > Street | Text in the user interface for Street. |
| User Interface > Zip/Postal Code | Text in the user interface for Zip/Postal Code. |
| User Interface > City | Text in the user interface for City. |
| User Interface > Country | Text in the user interface for Country. |
| User Interface > Phone | Text in the user interface for Phone. |
| User Interface > E-Mail Address | Text in the user interface for E-Mail Address. |
| User Interface > Reenter E-Mail Address | Text in the user interface for Reenter E-Mail Address. |
| User Interface > Payment | Text in the user interface for Payment. |
| User Interface > Personal Information | Text in the user interface for Personal Information. |
| User Interface > Thank You Message | Text of thank you message after a successful order. |
| User Interface > Date Format | Date format in the user interface (PHP formatted). |
| User Interface > Info about Terms and Conditions | Information text about Terms and Conditions. |
| User Interface > Accept Terms & Conditions | Text in the user interface to accept the Terms and Conditions. |
| User Interface > Empty Cart | Text in the user interface for Empty Cart. |
| User Interface > VAT | Text in the user interface for VAT. |
| User Interface > Sub Total | Text in the user interface for Sub Total. |
| User Interface > ...% VAT on ... | Text in the user interface for ...% VAT on .... |
| User Interface > Background Color to Highlight the Order | Choose a background color to highlight the order. |
| User Interface > Terms and Conditions | Text in the user interface for Terms and Conditions. |
| User Interface > Cancellation Policy | Text in the user interface for Cancellation Policy. |
| User Interface > Continue with PayPal | Text in the user interface for Continue with PayPal. |
| Link Style > Font Style | Specifies the font style for links.
Activate a checkbox to set a style attribute and override the global Font Template of the project.
|
Visual Effects
You can specify a visual effect, if a website visitor interacts with a link (e.g. change the color if the visitor moves the mouse over the link). The following properties are the same for Moving Mouse Over Link Effect, Clicking on Link Effect and Already Visited Link Effect.
| Effect > Change Font | Changes the font style of a link. |
|---|---|
| Effect > Font Style | Specifies the font style, to which you want to change. Activate a checkbox to set a style attribute and override the global Font Template of the project.
|
Properties for Product Items
These properties can be set for a product item. Select a product item to see its properties.
| Item > Identifier (Id) | Specifies the name of the item in order to address it in animations or as a link target. Use only letters and numbers for the name, no spaces or special characters. |
|---|---|
| Item > Left | Sets the distance in pixels from the left side of the item to the area where the item is located. |
| Item > Top | Sets the distance in pixels from the top side of the item to the area where the item is located. |
| Item > Width | Sets the width of the item in pixels. |
| Item > Height | Sets the height of the item in pixels. |
| Item > Padding Left | Sets the distance from the left side of the item to the content in pixels. |
| Item > Padding Right | Sets the distance from the right side of the item to the content in pixels. |
| Item > Padding Top | Sets the distance from the top side of the item to the content in pixels. |
| Item > Padding Bottom | Sets the distance from the bottom side of the item to the content in pixels. |
| Item > Background Color | Select a background color for the item. |
| Item > Background Picture Clip | Select a background picture from the Fishbeam Clips library. This option is only available if you have the Fishbeam Clips library installed. |
| Item > Background Picture | Select a background picture for the item. With Repeat, you can choose how the picture will be displayed. On Retina websites the background picture will be displayed with double resolution, but half the size (except SVG images). |
| Item > Repeat | Repeats the background picture.
|
| Item > Position Horizontal | Sets the horizontal position of the background picture. If the picture will be repeated, it will be placed once on the specified position and the remaining space on the left, on the right, above and below will be filled. |
| Item > Position Vertical | Sets the vertical position of the background picture. If the picture will be repeated, it will be placed once on the specified position and the remaining space on the left, on the right, above and below will be filled. |
| Item > Fix relative to Browser window | The position of the background picture is calculated on the basis of the browser window. The picture is pined to the window and will not move when scrolling. The picture can be hidden or only parts are visible if it is outside of the visible space. |
| Item > Border Left Width | Displays a border on the left side of the item in the choosen width (pixels). |
| Item > Border Left Color | Select a color for the left border. |
| Item > Border Right Width | Displays a border on the right side of the item in the choosen width (pixels). |
| Item > Border Right Color | Select a color for the right border. |
| Item > Border Top Width | Displays a border on the top side of the item in the choosen width (pixels). |
| Item > Border Top Color | Select a color for the top border. |
| Item > Border Bottom Width | Displays a border on the bottom side of the item in the choosen width (pixels). |
| Item > Border Bottom Color | Select a color for the bottom border. |
| Item > Opacity (%) | Makes the item transparent. From 0% (fully transparent) to 100% (completely visible). |
| Item > Rotation | Rotation of the object in a clockwise direction from 0° to 360°. |
| Item > Moving Mouse Over Animation | Select an animation that you have previously created with an Animation item. The animation will be started as soon as the website visitor moves the mouse over the item. |
| Item > Moving Mouse Out Animation | Select an animation that you have previously created with an Animation item. The animation will be started as soon as the website visitor moves the mouse from the item. |
| Product > Product ID | Enter a unique item number for the product. The item number can not contain spaces or special characters. |
| Product > Produktname | Product Name. This will be displayed in the shopping cart. |
| Product > Price | Price of the product. The currency and tax is set in the shopping cart. |
| Product > Differing Tax (%) | Enable this if the tax for this product differs from the global tax which is set in the shopping cart. |
| Product > Label | The text in the product button. |
| Product > Alignment | Sets the alignment of the text in the product button. |
| Product > Font Style | Specifies the font style of the product button. Activate a checkbox to set a style attribute and override the global Font Template of the project.
|
| Product > Padding Left | Sets the distance from the left side of the product button to the content in pixels. |
| Product > Padding Right | Sets the distance from the right side of the product button to the content in pixels. |
| Product > Padding Top | Sets the distance from the top side of the product button to the content in pixels. |
| Product > Padding Bottom | Sets the distance from the bottom side of the product button to the content in pixels. |
| Button > Custom Button Picture | Select a picture as an icon for the button, if you don't like the default product button. |
Visual Effects
You can specify a visual effect, if a website visitor interacts with the product button (e.g. change the picture if the visitor moves the mouse over the button). The following properties are the same for Moving Mouse Over Link Effect and Clicking on Link Effect.
| Effect > Change Picture | Changes the picture. Select an picture to which you want to change. |
|---|
Did this help page answer your questions?
If you need additional assistance regarding this topic or if there's missing some information in this chapter, please write us.