


 Media
Media
Add QuickTime, Flash, RealMedia and Windows Media files to your website.
You can add a media player to every page area or area template. To add a media player, edit the content of a page area or area template and drag the media player from the elements panel to the editor.
![]()
A media player displays media content in many different formats. Add Quicktime compatible video, Windows Media compatible video and audio, Flash movies or RealMedia compatible video and audio.
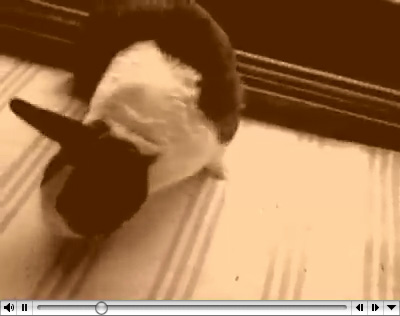
 Flash video (.flv files) are not supported. It is required to embed these files into a normal flash movie (.swf file). You can display the .swf file in a Flash player then.
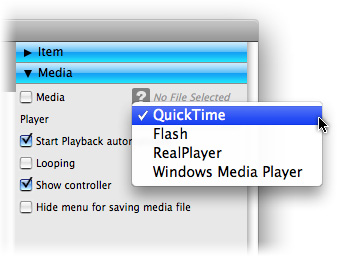
Select the player, which you want to use on the properties panel at Player and select a media file from your harddisk at media. Every player type has a number of player specific properties.
Properties for Media
These properties can be set for a media player. Select a media player to show its properties.
| Item > Left | Sets the distance from the left side of the parent element in pixels. |
|---|---|
| Item > Top | Sets the distance from the top side of the parent element in pixels. |
| Item > Width | Sets the width of the item in pixels. |
| Item > Height | Sets the width of the item in pixels. |
| Item > Padding Left | Sets the distance from the left side of the item to the content in pixels. |
| Item > Padding Right | Sets the distance from the right side of the item to the content in pixels. |
| Item > Padding Top | Sets the distance from the top side of the item to the content in pixels. |
| Item > Padding Bottom | Sets the distance from the bottom side of the item to the content in pixels. |
| Item > Background Color | Select a background color for the item. |
| Item > Background Picture | Select a background picture for the item. With "Repeat", you can choose how the picture will be displayed. |
| Item > Border Left Width | Displays a border on the left side of the item in the choosen width (pixels). |
| Item > Border Left Color | Select a color for the left border. |
| Item > Border Right Width | Displays a border on the right side of the item in the choosen width (pixels). |
| Item > Border Right Color | Select a color for the right border. |
| Item > Border Top Width | Displays a border on the top side of the item in the choosen width (pixels). |
| Item > Border Top Color | Select a color for the top border. |
| Item > Border Bottom Width | Displays a border on the bottom side of the item in the choosen width (pixels). |
| Item > Border Bottom Color | Select a color for the bottom border. |
Item > Add HTML Code  | Add custom html code to the item to extend Goldfish's functionality. |
| Item > Add CSS Code | Add custom css code to the item. The code will be stored in the css section of your website. You can't change the css code of internal items, but you can use the css code in your custom html code. |
| Item > Identifer (Id) | Sets the value for the "id" property. You can use this id to access the item with JavaScript. |
| Media > Media | Select the media file from your harddisk, which you want to display. |
| Media > Player | Select the player type, which can play the media file. |
| Media > Start playback automatically | Starts playing automatically after the page is loaded. |
| Media > Looping | Plays the media file in an endless looping. |
| Media > Show controller | Shows playback controls like play, stop and pause (QuickTime, RealPlayer, Windows Media Player only). |
| Media > Hide menu for saving media file | Hides the menu for saving the media file (QuickTime only). |
| Media > Transparent background | Displays flash movies with alpha and transparency in front of the page content (Flash only). |
Did this help page answer your questions?
If you need additional assistance regarding this topic or if there's missing some information in this chapter, please write us.