


 Page Area
Seperate the pages of your website in areas. E.g. an area for header, navigation, footer and content.
On every page of your website there are several page areas (e.g. for header, footer, navigation and content).
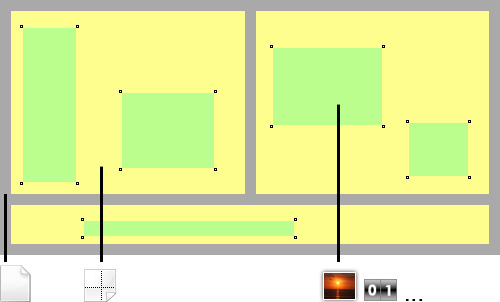
Every page area (yellow) contains the content of your website like menus, images and text. to understand Goldfish's page model, read the documentation for project.
There are usually more than one page areas on a page. You can set a fixed with and a minimum height for every page area. The real high of a page area depends on its content and the height of the other page areas in the row.
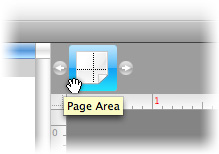
To add page areas to a page, select the page and drag a page area from the tools on your page.
 Deletes the selected page area.
If you add page areas, the page will be filled row-wise from top to bottom. There are as many page areas in a row as their with is smaller than the width of the page. If the row is "full", the next area will be displayed below in the next row.
 The high of all page areas in a row is the same. Always the hight of the biggest page area will be choosen.
Properties for Page Area
These properties can be set for a page area. Select a page area to show its properties.
| Page Area > Area Template | Select an area template, if you want to overwrite the style of the page area with a template. Note that all style properties for this page area are hidden, if a area template is selected, because the style will be set in the template then. |
|---|---|
| Page Area > Width | Sets the width of the page area (pixel). The width of a page area must be smaller or the same like the page with. |
| Page Area > Height (min) | Sets the minimal height of the page area (pixel). The real height is calculated by the height of the content and the height of other page areas in the same row. |
| Page Area > Margin Left | Sets an offset from the left side of the page area content. |
| Page Area > Margin Right | Sets an offset from the left side of the page area content. |
| Page Area > Margin Top | Sets an offset from the top side of the page area content. |
| Page Area > Margin Bottom | Sets an offset from the left side of the page area content. |
| Page Area > Background Color | Select a background color for the Page Area. |
| Page Area > Background Picture | Select a background picture for the Page Area. With "Repeat", you can choose how the picture will be displayed. |
| Page Area > Border Left Width | Displays a border on the left side of the Page Area in the choosen width (pixels). |
| Page Area > Border Left Color | Select a color for the left border. |
| Page Area > Border Right Width | Displays a border on the right side of the Page Area in the choosen width (pixels). |
| Page Area > Border Right Color | Select a color for the right border. |
| Page Area > Border Top Width | Displays a border on the top side of the Page Area in the choosen width (pixels). |
| Page Area > Border Top Color | Select a color for the top border. |
| Page Area > Border Bottom Width | Displays a border on the bottom side of the Page Area in the choosen width (pixels). |
| Page Area > Border Bottom Color | Select a color for the bottom border. |
Page Area > Add HTML Code  | Add custom html code to the Page Area to extend Goldfish's functionality. |
| Page Area > Add CSS Code | Add custom css code to the Page Area. The code will be stored in the css section of your website. You can't change the css code of internal items, but you can use the css code in your custom html code. |
| Content > Edit Content | Edit the content of your Page Area and add images, text or other content to your website. |
Konnte diese Hilfeseite Ihre Fragen beantworten?
Wenn Sie zu diesem Thema noch weitere Hilfe benötigen oder in diesem Kapitel eine Information fehlt, schreiben Sie uns.